Thursday, 6 June 2019

Plaguebearers on budget (first batch of 5 models)

Just found some pics from the micro sd of my old swollen & broken smartphone (R.I.P.). 


So, last spring I thought my Nurgle hordes for 40K & AoS needed some big unit(s) of Plaguebearers. I had a box of the new plastic ones and a few older metallics, but decided to build a much bigger group from scratch, with not spending huge amounts of money on them. Found some toys from local flea markets & my own stash of old stuff. Some melting, cutting and adding of a few choice miniature bits, jewellery chain, pearls & beads, guitar strings, wire, static grass and sand. The models were glued on approximately right sized buttons. Dirt cheap!

I base coated the models with cheap & bright green acrylic paint, and put puddles of Citadel technical paints on top. I drybrushed them with few coats of successively even brighter and cheaper greens. Final drybrush and dot highlights were done with Off White. Amarillo Yellow and Green Tone for glazing, and some heavy Game Color Flesh Wash spots on specific details. Now that's one of my absolute favorite paints! When applied gently, it just slightly dulls/warms up the colour underneath, but a thick layer will cover up even black. So I think it's very useful in blending things together, or as a rust/dirt effect. 


More drybrushing and highlights with Barbarian Flesh, Khaki and Off White again. Gun Metal and Flesh Wash to the chains and swords. Then Amarillo Yellow ink was used to glaze the green and yellow parts in multiple careful layers, a little Fuegan Orange on the horns/metals/edges/holes, and Nurgles Rot to glaze/shade and blend different coloured areas together. Green Tone for more shading and definition, plus another long time favorite for highlighting: Titillating Pink! I actually found a half used/half dry Monster Paint Set from the flea market just last spring for 0.5€, with that pink paint still intact!


Even more contrast was created with Red/Soft/Green Tones, Necron Compound, Titillating Pink and Fuegan Orange. Castellan Green for the base edges, and this first batch of Plaguebearers was almost ready. I decided to make 15 more of them, before putting any final touches and varnish on them...

Wednesday, 5 June 2019

WIP big Necromunda building (pt.6)

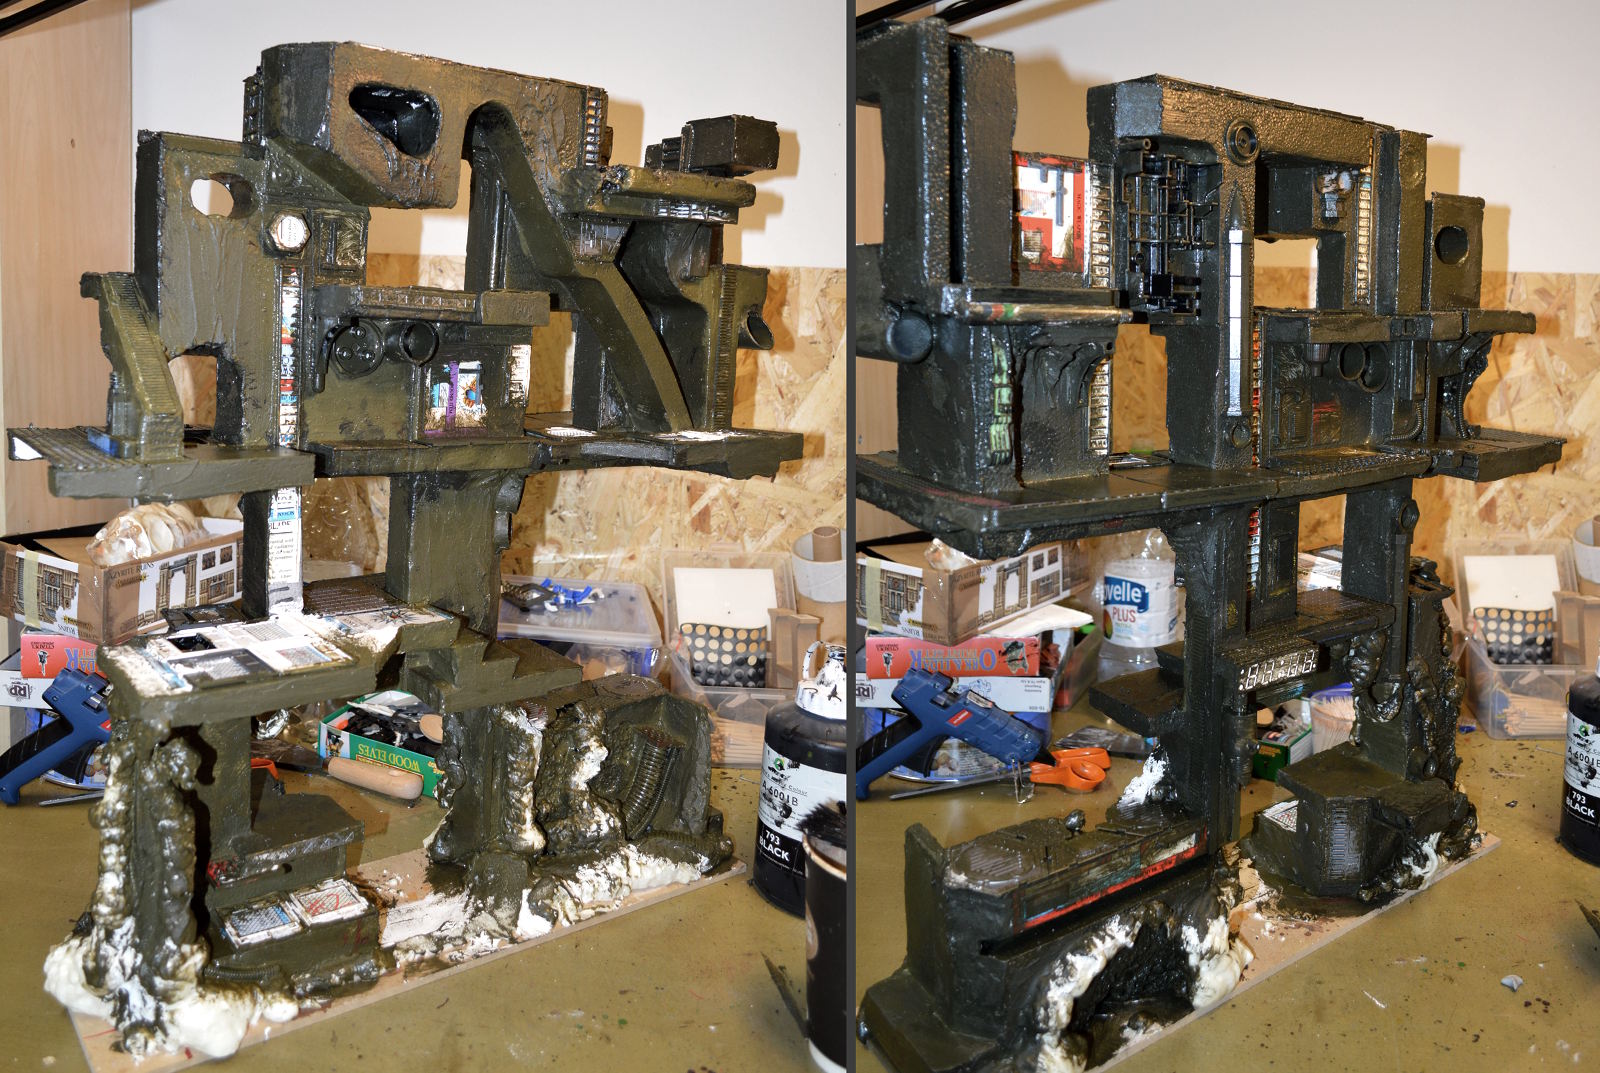
More mess to be made. Thick goo mixed from PVA, paint, toilet paper, fine sand and a few drops of dirty water. The burnt sienna coloured version of the goo is just the components mixed togehter and painted on with an old brush. For burnt umber (=darker) parts I left the toilet paper out of the mix, but instead drenched sheets of paper in the mix to create kinds of roots or veins. Shaping and molding them was a bit tricky, so next time I'll try to use more glue and paper to thicken up the mix.


Found some pearl clay from a pound shop, and it's absolutely great stuff! Easy to shape and attach, plus it dries quick. It might not stick well to completely flat surfaces, but works just fine in nooks & corners. I'll propably paint these little pearly eggs pink.

WIP big Necromunda building (pt.5)

Time to put some textured paint on! I mixed some PVA, paint (black, green and browns propably), fine sand and dirty water. Tried to avoid the more detailed bits and concentrated on covering the polystyrene parts, in case I decided to spray paint those pieces later.


More organic elements were being added here. Seashells from pound shop, wiring, papier-mâché balls and board game tokens for mushrooms. Spackle was used to blend things together. Think I applied it with just fingers and shaped with some stick to match the surface textures of the seashells.  Definitely nodding towards H. R. Giger, Tyranid organisms and Nurglesque lifestyle here.


Tuesday, 4 June 2019

WIP big Necromunda building (pt.4)

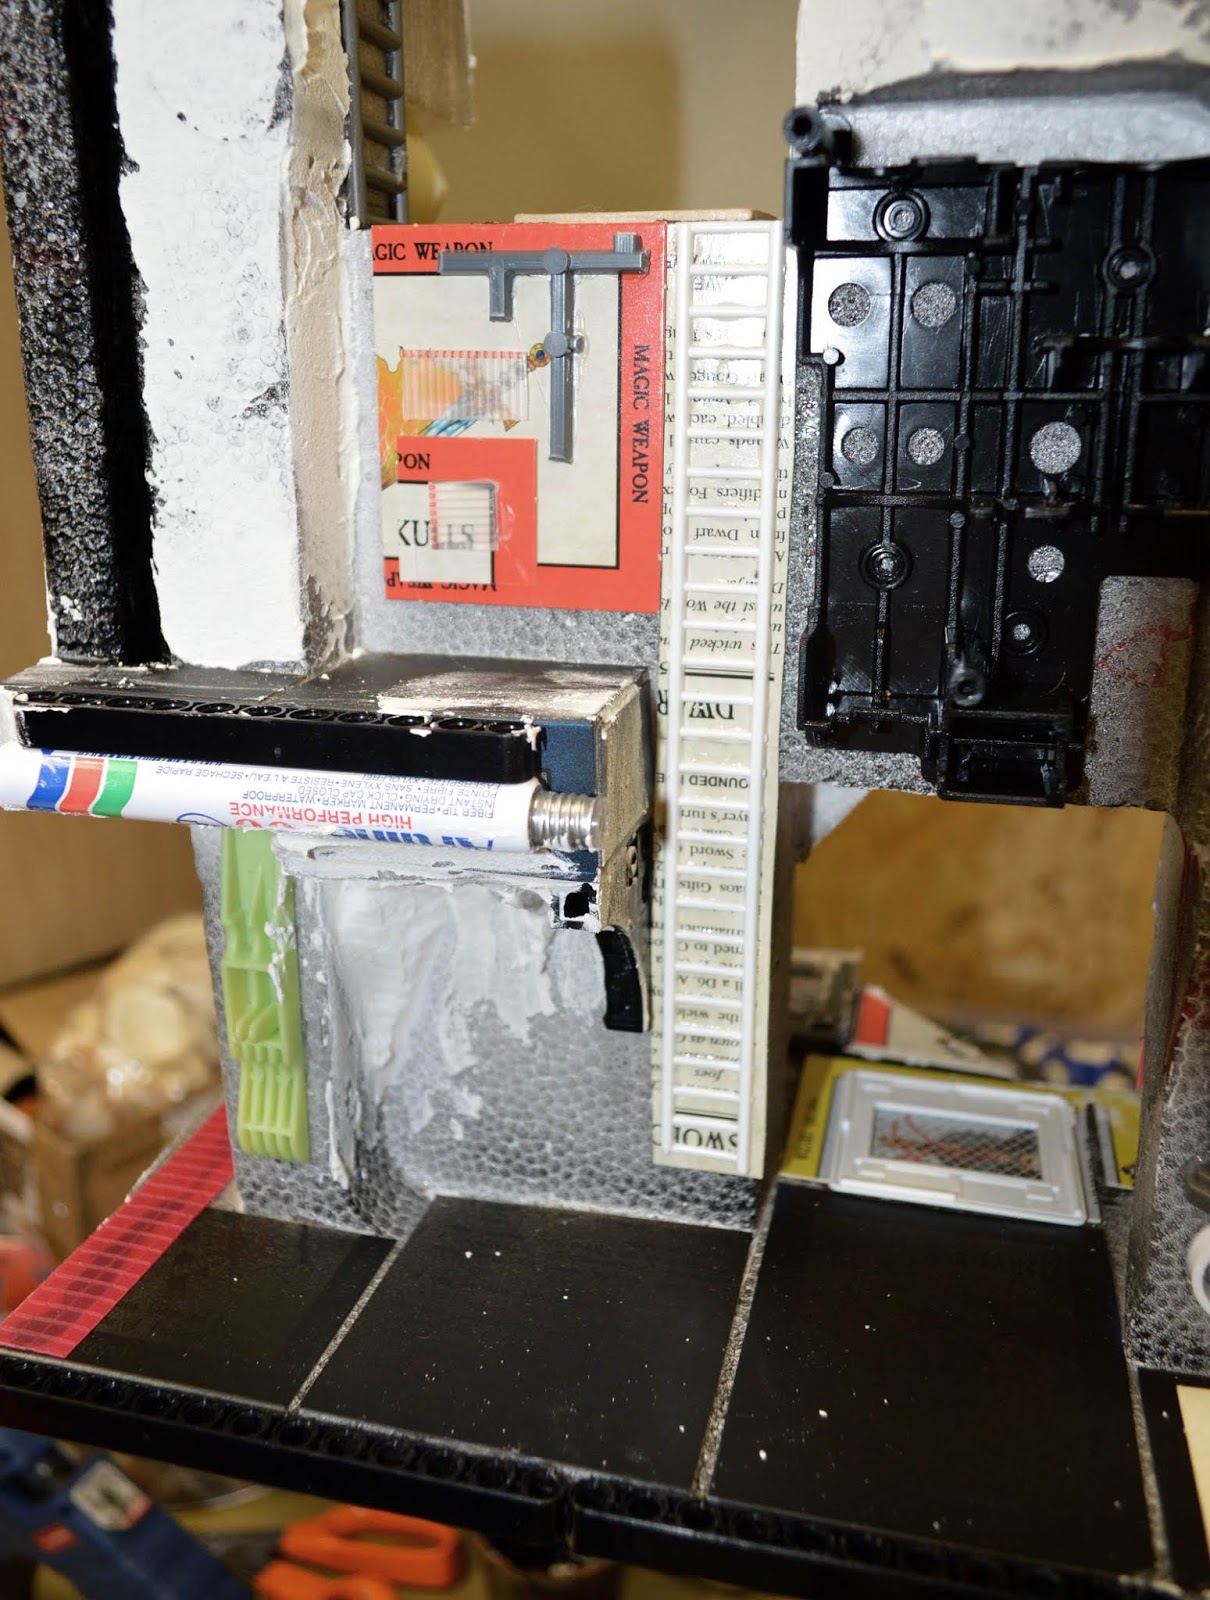
Again more bits, pieces and wall filler have been added. There's textured plasticard, soap dispenser mechanism, cardboard and plastic tubing, letter holder from Alfapet (Scrabble equivalent) and computer connector parts.

I usually just grab a pile of interesting random bits on the table and start hot gluing staff wherever it first seems to fit best. This way I don't have to do much (or any) measuring and very little cutting. The results are very haphazard, but I feel this is appropriate for structures supposedly located in places like Underhive. Built thousands of years ago, suffered from many hive quakes and constantly being rebuild and fought over. Actually the buildings might need some more melting, hammering and other rough-handed treatments...


WIP big Necromunda building (pt.3)

Yet more decorations added to the walls and platforms. Bits of card and sprue, marker pens, electrical installation components and clothespins. More wall filler is added in places to blend things together and add dirty texture.


WIP big Necromunda building (pt.2)


Time to add some mousse mega schuim! It's this expanding isolation filler that's easy to apply and impossible to clean. I gave the bottle a few shakes and started to sprout these organic/tyranoid/sump plant types of growth on the walls, working up from the ground level. Some of the walls and platform edges were also coated with wall filler to create texture and add sturdiness.


I kept adding more decorational bits & pieces here and there, most notably: legos, plastic piping, hair rollers, industrial plastic cog belts, parts from alarm clocks, disposable razors and cameras, empty paint bottles and slices from magazine holder.


I had bought a hot wire cutter after decades of dreaming about one. Cutting straight lines was impossible with my coffee shaken hands. But I could use two dice to kind of anchor the cutter to the table, and slide polystyrene through it to create level platforms. Any offcuts were used to make these concave support pieces for overhanging platforms on the walls. I'll cover the with cables or some organic looking junk later.


Monday, 3 June 2019

WIP big Necromunda building (pt.1)

I'm making a big building for Necromunda. It will be kind of modular, as the two high walls can be positioned in a number of different configurations. Seperate walkways and platforms for specific locations will be built as well.


First I cut the doorways into the polystyrene, and marked up rough positions for ladders, walkways, balconies and a few spots to get melt. I glued in some wooden tiles, coffee stirrers, pieces from various plastic scenery kits, bits of toys, circuit boards, card and plastic grids cut off some household crates. I didn't measure anything, just made cuts in the most obvious spots suggested by the form of the polystyrene frames I had.


Hot glue is great, so that's what I used! The exact amount of glue and the working speed had to be very precise to not melt the polystyrene. Some areas were also covered in black paint + PVA glue mix, to protect them and provide dark base coat that might be helpful later on. I also sprayed some areas with black to intentionally melt them.

I didn't want to cover the whole thing yet with any protective paint or filler, just in case I later wanted to make more cuts or melts to the polystyrene. This makes the building process a bit slower, but also enables kind of an intuitive workflow where cutting up a doorway here leads to adding a new platform there, that in turn might require some ladders etc. for example.


Here's a shot of one possible configurations of the whole building. I'll make some seperate triangle shaped floors to join the two walls together a bit better in certain spots.


Ladders under construction. I first attach them to pieces of card, just to make it easier to glue them on the walls and paint them.


Super nice find from the flea market! I got a big bag full of these plastic dia frames (hundreds of them, with no glass or anything in there) for a few euros. Just a quick square of hot glue, piece of aluminium mesh cut to shape, a dia frame on top and voilá!