After making decent amounts of jungle scatter terrain, I cleaned my working desk and the whole of my Hobby Castle. Had been a year since I've done proper and thorough cleaning here. And I've watched quite a bit of zombie stuff from Netflix recently. The Black Summer (season 1) was awesome! Now going through the Z Nation which is also turning out to be great. Inspired by them and the new Soulblight Gravelords book, I decided to make an Army of the (Un)dead for myself!
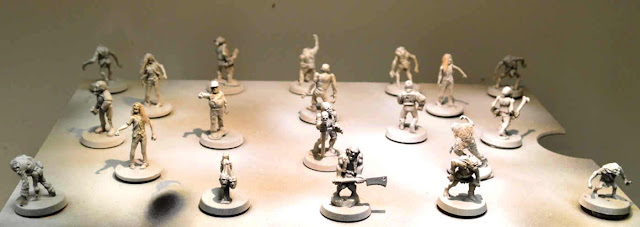
I really like the shambling hordes of Zombies (and Skeletons), so went to a local gaming shop and bought a box of Zombicide Zombies since they were on sale. Was thinking about buying loads more, but after a quick search through my bitz boxes and recent purchases from the FB marketplace's local miniature group, I noticed that I already had around 120 miniatures suitable for Zombies. Way to go! Only need lots of wolves / dogs / random animals to act as Dire Wolves, maybe a Mortis Engine, one or two Corpse Carts and a few characters.
I looked through some tutorials on Youtube about batch / speed painting zombies. I made the decision that I would NOT be using 5+ different browns to paint all the different pouches, leather straps, wooden shafts, hoods and clothes, then go picking up the skin parts with different pale greens and go grazy with rust effects on weapons. NO. I just wanted to have a strong horde effect. Not so much emphasis on single rank-and-file Zombies. Something very moody. Night, dirt, blood and death. Then I looked at the beautiful cover of the new Soulblight book. Just a pale mostly blueish scheme, with bright red guy in the middle. Super effective. I'd be making blood-stained dudes rising from the ground in a pale blue moonlight. And I'd be making them fast because I want to get an absolute horde of these guys done, rather sooner than later.
Here's a quick summary of what I did:
1) Matt Black spray primer. When dry, spray Wolf Grey, Desert Yellow or Army Green downwards at an slight angle, and finally Matt White directly from above.
2) Wash everything with Drakenhof Nightshade.
3) Drybrush Voidshield Blue, concentrating on the upmost parts, protruding hands, faces and edges.
4) Wash with Aethermatic Blue, not much needed on the legs and lower parts.
5) Drybrush Pale Grey Blue, concentrating even more upwards than with the Voidshield Blue.
6) Wash Fuegan Orange on the legs and undersides, where the shadows would be.
7) Gently drybrush Off White, mainly on heads, shoulders and hands.
8) Spray everything with Matt Varnish.
9) Splatter all around with sepia, brown and blood. I made a few different random mixes along the way. The final mixture was mostly Blood for the Blood God with some Agrax Earthshade Gloss.
10) The bases were covered in a thick mix of PVA glue, Burnt Umber paint and some sand, then immediately dipped in a jar full of Mixed Pizza Herbs.
11) When dry, heavily coat the bases with a mix of PVA, water and a little Seraphim Sepia, Athonian Camoshade & Nuln Oil washes (doesn't matter if it gets on the legs too). Just a dark & murky coat to seal the tiny bits of herbs in place.
12) Paint the base rims Matt Black.
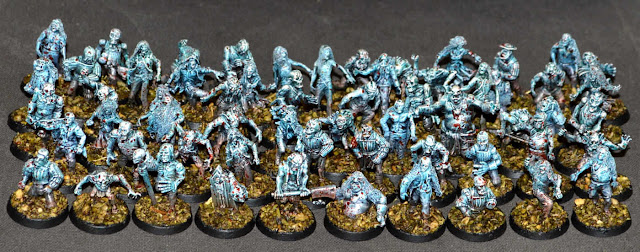
Most of these steps took only around an hour to do for the whole bunch. Some were even faster. All in all, painting this whole horde of 60 Zombies took around 9 hours of work, spread over the last week or so, an hour or two a day. So it's 9 minutes per miniature. Not bad. And I absolutely LOVE the end result. It worked out even better than I expected.
Here they are:


