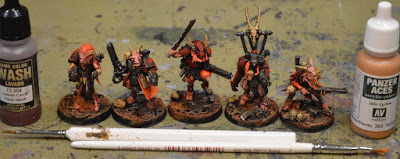
Done! Next I might add a few Squats to the team along some nice fellows from the Blackstone Fortress box. The Kroot sniper especially seems interesting.
A hobby blog about collecting, converting & colouring miniatures. DIY tabletop terrain making & wargaming, mostly Warhammer Age of Sigmar, 40k and Necromunda. Dirty waters & thick paints.
Wednesday, 19 February 2020
Necromunda Venators WIP (pt.6 - painting)
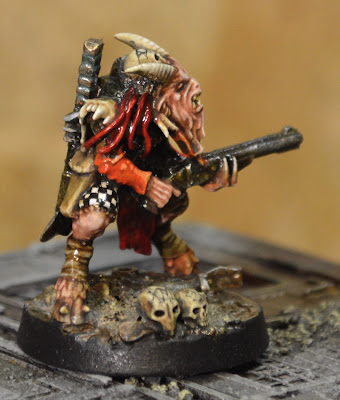
Yet more WIPs of the Beastmen, done in 13th-15th of February. Lots of refining areas, adding verdigris and subtly shading allover with greens to contrast with all the reds and oranges. Tried new Pigma Micron "archive quality" ink pens in high hopes that they wouldn't dissolve when varnishing, but no. Still had to paint some of the black & white checkers over the ones that got smudgy. But it's probably okay, since using ink pens for selected detail work is WAY faster than paints.
I had also bought a couple of weathering powders, but after quickly trying some on a piece of terrain and not quite feeling it, I decided to stain the bases of the Venators with the good old dirty paint water bottom sludge. Worked out absolutely fantastic as always.
Quite a lot of wet blending also took place. The holsters, scrolls, bandages etc. had already been painted mid brown or grey (with shading and subtle highlights), but received a very simple finishing coat I really liked: First light allover wash of Seraphim Sepia, and while it was still wet, some Pale Grey Blue was gradually mixed in to create highlights. Did the same thing on the orange clothes with dirty waters, orange paints and Off White.
The finest detail work (such as the teeth) were done with the Army Painter Standard Brush. Really like it better than the more tiny ones, 'cause it can hold way more paint in it.
Tuesday, 11 February 2020
Necromunda Venators WIP (pt.5 - painting)
An odd morning hour well spent on painting again. Tried some wet blending on red areas with Fire Dragon Bright, Phoenix Flames and Lahmian Medium. Came out very nice on a few spots (most notably the big Marine shoulder pads and arms), and complete crap on others. I'll propably throw in the traditional slightly thinned down layer of Blood for the Blood God on the red areas to unify them. Also the brighter orange areas need something. Maybe some fine highlights and recess shading (dark green)?
Edge highlighted the horns and skulls with Bonewhite, using the Army Painters Standard Brush this time. Then washed the holsters, trousers, scrolls and other mid brownish areas with a mix of Seraphim Sepia and Pale Grey Wash. Tried wet blending in some Bonewhite highlights on those areas as well, and the old & worn out Regiment Brush got utilized here. Liked doing these areas a lot, and feel they came out very nice. So another great combo of paints found by chance!
Edge highlighted the horns and skulls with Bonewhite, using the Army Painters Standard Brush this time. Then washed the holsters, trousers, scrolls and other mid brownish areas with a mix of Seraphim Sepia and Pale Grey Wash. Tried wet blending in some Bonewhite highlights on those areas as well, and the old & worn out Regiment Brush got utilized here. Liked doing these areas a lot, and feel they came out very nice. So another great combo of paints found by chance!
Monday, 10 February 2020
Necromunda Venators WIP (pt.4 - painting)
Started painting the Beastmen last friday night. Decided to try using black AND white basecoats, depending on the part of the model. So black basecoat on the metal parts, white on skin and so forth. Didn't wait for the black to dry before applying white, so medium greys appeared. I also diluted the paints just a bit, but propably didn't mix them properly, because on some parts they started to come off later. So f*** this method. And it was super slow, because I had to stop and think every once in a while. Gonna return to the black spray with grey & white zenithals after this silly tomfoolery.
Nice things occured as well. Had bought the Vallejo Oily Steel and Transparent Orange paints that I liked a lot. That Orange together with Warpaints Pure Red (highlighted with a little Off White) formed the basis of the bright orange areas, while mixed with some Fuegan Orange it was used as a wash for ALL the reds, oranges and metals. Because the whole model was so overpoweringly red/orange, the Athonian Camoshade wash on the base provided much needed contrast. Gonna add a bit more green/teal somewhere later on.
Still have to pick out some details (bronze items, skin/fur/bone and whatnot). Was thinking about adding the traditional black & white checker pattern or flames, but have no idea where they would fit. Also bought some weathering powders, which I've never used before!
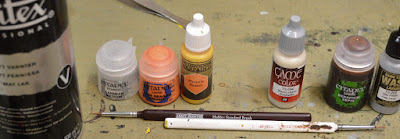
And btw here are my much beloved brushes that I use for pretty much everything. Did the edges on red areas with the Standard Brush (that's in a lot better shape than these), and final details will likely get attention from Fine/Insane Detail Brushes. So all praise to the Springer Pinsel Synthetic 5 (I guess?), Army Painter Small Drybrush (on the left) & Regiment brushes (the middle one). I remember using this particular Regiment Brush to do all the finest of details a year ago. Back then it had around three or four a bit longer and protruding bristles right in the middle, so was just perfect for that kind of work.
Subscribe to:
Comments (Atom)


